
10 Essential CNC Machining Tips: An Expert Guide to Precision & Efficiency
CNC (Computer Numerical Control) machining is a sophisticated manufacturing process that utilizes computerized controls to operate precision machine tools. This technology is renowned for its exceptional accuracy, high repeatability, stable quality, ability to produce complex geometries, and superior efficiency. However, despite its high level of automation, the knowledge and experience of the operator remain crucial in determining the final quality of the machined part. This article consolidates ten essential pieces of expert advice to optimize your CNC machining processes.
1. Key Principles for Arranging CNC Machining Sequence
The sequence of operations must be planned carefully based on the part’s geometry, raw material condition, and fixturing requirements, with a primary focus on maintaining the workpiece’s rigidity.

- Group by Setup/Tool: Sequence operations that use the same fixture setup or the same cutting tool consecutively. This minimizes (repeat positioning), tool changes, and fixture adjustments, saving time and reducing errors.
- Prioritize Low-Impact Operations: During a single setup, perform operations that cause the least stress or distortion to the workpiece first.
- Ensure Sequential Integrity: The machining of one operation must not compromise the (positioning and clamping) for subsequent operations. This is critical when integrating processes with conventional machines.
- Machine Internals First: Generally, machine internal features (e.g., cavities, holes) before external contours. This provides more stable material support during the machining of external shapes.
2. How to Effectively Divide CNC Machining Operations?
Strategically dividing the manufacturing process into operations is key to efficiency. Common methodologies include:
- Feature-Based Division: For complex parts, group machining by geometric features—e.g., all flats, then all holes, then contours. Follow the best practice sub-rule: machine datums and simple shapes first, then move to more complex, high-tolerance features.
- Tool-Based Division: Complete all machining possible with one tool before switching to the next. This tool-centric approach drastically reduces tool change time and air cutting, improving overall cycle time.
- Roughing/Finishing Division: Always separate roughing and finishing into distinct operations. This is vital for managing material stress, thermal distortion, and achieving final dimensional accuracy and surface finish. The choice between a centralized or dispersed operation strategy depends on the part, machine capability, and production volume.
3. Critical Preparations Before CNC Programming
After planning the machining process, a programmer must gather all necessary information:
- Workholding Method: How will the part be fixtured? (Vise, fixture plate, custom jig).
- Blank Size & Condition: Determines the stock boundaries and whether multiple setups are required.
- Workpiece Material: Dictates the selection of appropriate cutting tools, speeds, and feeds.
- Available Tooling Inventory: Programs should be written around available tools to avoid delays. If a special tool is needed, it must be identified and procured early.
4. What to Consider When Determining Workpiece Fixturing?
Fixturing is foundational to accuracy. Key considerations include:
- Minimize Setups: Aim to complete as many features as possible in a single setup to maintain accuracy.
- Eliminate Manual Adjustment: Rely on designed fixtures, not manual tweaks, for consistency and repeatability.
- Unified Datums: Strive for consistency between the design, process, and programming datums to minimize error stack-up.
- Avoid Interference: The fixture must not interfere with the tool path. Use modular vises or base plates with strategic clamping to ensure clear access for the tool.
5. The Principle for Setting Safe Height in Programming
The Safe Height (or Clearance Plane) is a Z-axis position where the tool can move rapidly without any risk of collision.
- Rule: It must be set higher than the tallest feature on the workpiece or fixture. Alternatively, setting the programming Z-zero on the topmost surface simplifies this process and is a highly effective strategy for collision avoidance.
6. How to Set the Tool Setting Point? Work Coordinate System vs. Programming System
- Work Coordinate System (WCS): The origin of the WCS is set by the operator on the machine, defining the part’s position in the machine’s travel. The Programming Coordinate System in the CAM software must match this WCS exactly.
- Tool Setting Point: It can be on the workpiece, but it must be a precision datum. A best practice is to set a relative reference point on the machine table or fixture that has a known position relative to the part datum. This allows for easy re-establishment of coordinates if the original datum is machined away. Choose a point that is easy to find, simplifies programming, minimizes error, and is easy to verify.
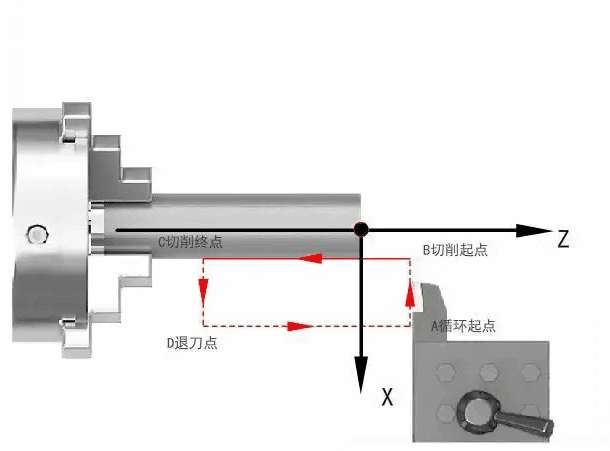
7. How to Optimize the Tool Path?
The tool path is critical for quality and efficiency. An optimized path ensures:
- Dimensional Accuracy & Surface Finish: The final contour should be machined in a continuous, finishing pass.
- Efficiency: The path should be the shortest possible, minimizing non-cutting time (air moves).
- Tool Longevity: Smooth entry and exit moves (arc-in/arc-out) prevent tool marks and sudden load changes that damage the tool and workpiece.
- Simplified Programming: The path should be easy to program and edit.
8. How to Monitor and Adjust During the CNC Process?
Vigilant monitoring is key to preventing scrap.
- Roughing: Monitor the load meter to ensure efficient material removal without overloading the spindle or tool. Adjust feeds and speeds accordingly.
- Finishing: Focus on surface quality. Watch for built-up edge (BUE) and tool deflection in corners. Ensure coolant is effective. If issues persist, check the program.
- Auditory Monitoring: Listen to the cut. A smooth, consistent sound is good. Chatter, vibration, or irregular noises indicate problems like tool wear or a loose fixture that need immediate adjustment.
- Tool Management: Track tool life based on cutting time, sound, and periodic inspection to replace tools before they fail and scrap parts.
9. Rational Selection of Tools, Materials, and Cutting Parameters
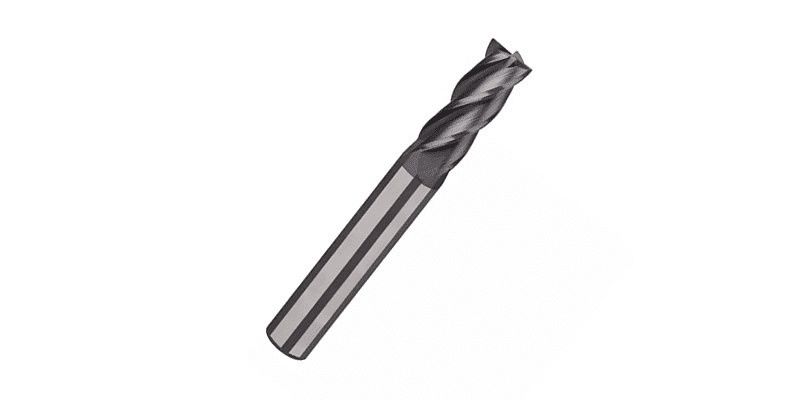
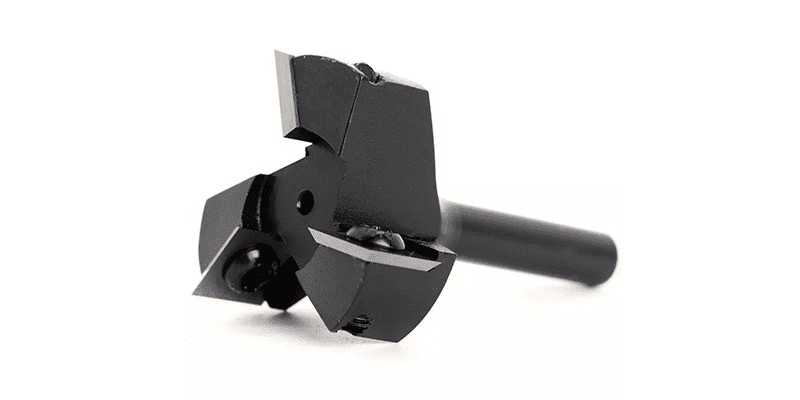
- Tool Selection:
- Face Milling: Use indexable carbide insert face mills or end mills.
- Shoulders & Slots: Use end mills.
- Contours & 3D Surfaces: Use ball nose end mills for finishing. Corner radius end mills ( Bull Nose End Mills ) are superior for roughing and semi-finishing due to their strength.
- Cutting Parameters: The core elements are Cutting Speed (SFM or m/min), Feed Rate (IPM or mm/min), and Depth of Cut.
- Stepover: For milling, the recommended stepover is 60-75% of the tool diameter for roughing and 5-10% for finishing.
- Calculations: Spindle Speed (RPM) and Feed Rate are calculated from the desired Cutting Speed and tool diameter. Always refer to tool manufacturer’s data.
10. The Role and Content of the Setup Sheet
The setup sheet is a vital communication tool between programming and the machine operator. It is a directive that must include:
- Part Name/Number, Program File Name, and Revision.
- A detailed setup drawing showing orientation, datums, and clamp positions.
- A comprehensive tool list with tool numbers, offsets, and descriptions.
- Key machining parameters for each operation (e.g., max depth of cut, roughing/finishing).
- Estimated cycle times for production planning.